Madness or Talking Heads?

Why did I name this blog that way?

Tuesday, October 28, 2008

Deck Work


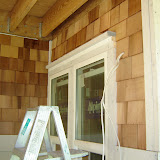
The decks have been needing attention for months and I had to deal with them before weather really gets bad. The outer edge flashing needed to be removed along with the blocking that had been installed behind it, which wouldn't allow room for the faschia to be installed properly.

Deck edge with flashing removed. Wood backing is still in place, which prevents the faschia board from fitting up behind the flashing properly. Initially the decks were to have a liquid membrane (paint on) type deck surface, but the base membrane material that was applied in the spring had begun to fail already. I couldn't just apply more base material over the top & hope for the best. The liquid membrane surface wants at least 40 degrees temperature in order to apply it properly, which we are not getting consistently these days.


Deck edge is trimmed, caulked and flashing installed, ready for a second faschia board to be installed above. This would create a clean deck edge, ready for a new deck surface to be installed.


I called Ron Stewart of DuraDek Seattle and he responded right away. Ron installs 60 mil vinyl deck surfaces with heat welded seams, made by DuraDek. The product acts as its own flashing also. Basically it forms a continuous non-broken surface from up under the siding, across the deck surface, and over the edge.

In order to provide a perfect deck surface, Ron's crew installs Hardibacker over the old deck surface.

About half the top deck was installed today - its ok to walk on it immediately, which is a huge plus.


I chose this taupe colored texture for the deck surface - its non-slip & looks great.
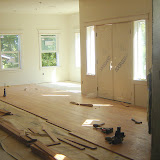
Int/Exterior Paint update


Exterior paint & stain is about 99% complete. We have to paint a few additional pieces of trim here & there, but its looking great.


"Custom" plastic garage door sheeting will be replaced with real garage doors next week.


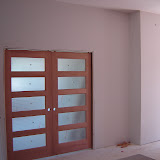
The doors from the Den had to be taken out and turned around - they were installed backwards. Not a good thing for keeping the water out - thanks to Ron Stewart from Duradek Seattle for pointing out this "little" detail.


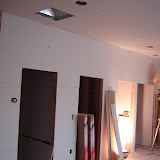
Gloomy enough for Halloween - but we're not partying yet. This is the master bedroom, all masked off for the trim to be primed & painted.

The Master Bath wearing blue tape & brown paper.

Tuesday, October 21, 2008

More Painting Progress


On sunny days, Marco's crew from Jimenez Brothers have been outside getting the place painted & stained. Unfortunately the cedar shingles that were put up a couple months ago had been exposed to the elements, causing water stains over most of the surface. Marco's crew sprayed and scrubbed every shingle with a pre-stain cleaner/sealer prior to shooting the stain we picked. The pre-sealer helped to restore the original color of the cedar, washing out the water stains and preparing the wood to take the stain more evenly.


We chose a stain from Daly's, which has a grey-brown look to it. It changes alot depending on the way sunlight hits it - sometimes it looks grey-blue, sometimes it just looks light brown. We are really happy with the result!

The painters are working on the trim and base color this week, in between rainy days. They expect to be totally finished with painting in the next two weeks.

Painting Progress

I called Marco from Jimenez Bros. Painting on a Monday about two weeks ago. He came up from Seattle that day, and by Tuesday morning at 8:30 am, I had a crew of 3 busy prepping the trim. They have worked Monday thru Saturday since then. I was amazed when I saw the amount of manual labor that went into making the trim look perfect. These guys filled & sanded, filled again, sanded again. Then they inspected every square inch using a spot light, while making final touch ups. They masked off the entire place, then shot the trim with primer. Then they spent an entire day hand sanding every square inch of the trim again. Finally, the trim was sprayed with a final coat of satin Chantilly Lace white. An incredible amount of work, yet they are now starting all over again on the second floor.

Trim Pack in final putty stage. It get sanded, primered & sanded again before final paint.


All masked off, primered and ready to shoot final finish.

If you have a painting project, I highly recommend Jimenez Brothers. Call Marco at 206.261.5960. His crews are hard working, thorough and do incredible work.

Tuesday, October 7, 2008

Good progress despite a very tough month

Who hasn't had a tough month? Bank failures, Wall Street sell-offs and a terrible housing market have not only been a huge distraction, but have directly affected all of us.
Two weeks ago I watched Washington Mutual's stock tank, and after seeing an additional 65% drop after-hours I ran to Wamu just before closing. I managed to get some critical construction funds out of my account. Wamu failed only hours later, and if it weren't for the FDIC watching its own back, Wamu would have locked out its customers. Not a good feeling. I bumped into a reporter for the Everett Herald on the way out of the bank. The story made the front page the next day.

Meanwhile, the house project has had its own drama, but at least progress has been made. Finishing Touch PNW, Inc. gets a thumbs up for some beautiful tile work (they also installed the Brazilian Cherry hardwood floors). All three upper bathrooms are custom layouts. Here are some pics:


Master Bath: Italian porcelain tile, floor to ceiling. The tiny backsplash tiles are a glass tile called Kyoto Silk, from Lunada Bay Tile. A massive piece of 1/2" thick glass is being made to create the interior shower wall, which will run from floor to ceiling (9-feet x 4-feet). Other than the glass, its an open walk-in shower. Opening is for the round soaking tub.


18"x36" Ston-grey Italian Porcelain floor tiles make up the floor.


To contrast the grey floor tiles & espresso colored shower walls, we chose Muluka tan pebbles for the shower floor. These really contrast well with the other tile & we get a nice foot massage every time we shower. We also had the pebbles installed as an accent border around the shower pan & tub base as you can see both pictures above.


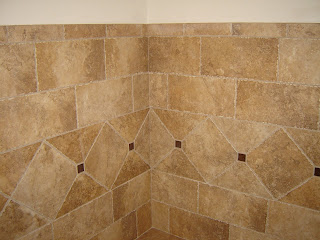
Upper Powder Bath. Tile floor with shoulder high wainscot. These are a rustic ceramic tile in 3 different sizes with a ton of cut-in detail.


Accent tiles are a really cool looking cracked-glass tile called Tantrum Glass.

I think we are gaining momentum now. The trim pack was pretty extensive to install, and is being prepped for paint as I write this. Once the trim is finished, we'll move forward with final colors inside as well as getting the outside painted & stained(weather permitting of course).